Bow Bedroom Bettering

I suppose the first thing to address is: is Bettering a pretend word?
I don’t know, I get it, and I bet you do. So we are all good.

This tale is about the bettering of Alhambra’s Bow Bedroom.

Not unusual on a boat are nasty termite annoyances. Sadly the Bow Bedroom became a mild casualty of termite lunacy.

A project to end the termite and repair the resulting damage began.

Damaged floorboards, under support structure and storage wall

Naturally, this starts with termite extermination.
Thanks to Pest Guy and a nine-month plan, we have been able to stop the colony’s wood-eating frenzy.
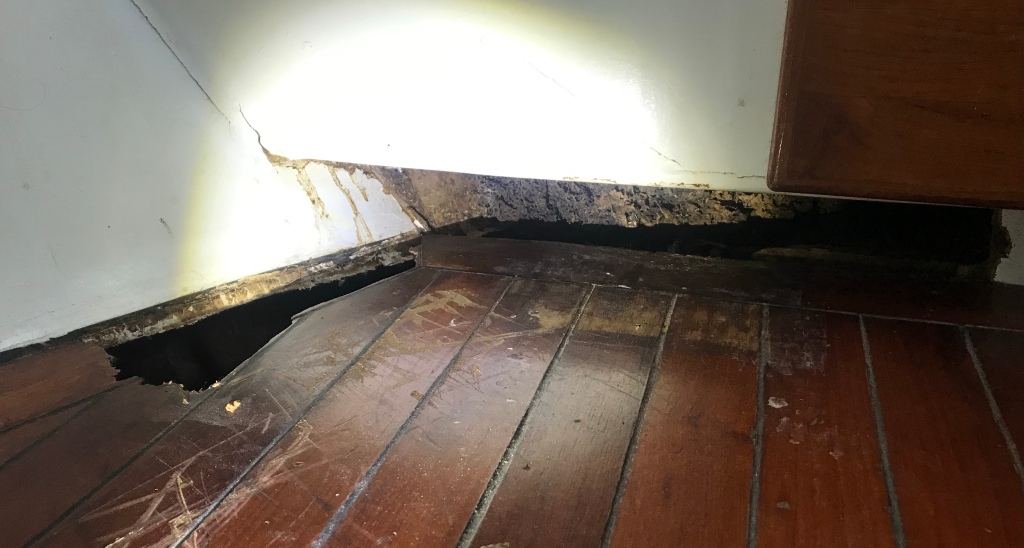
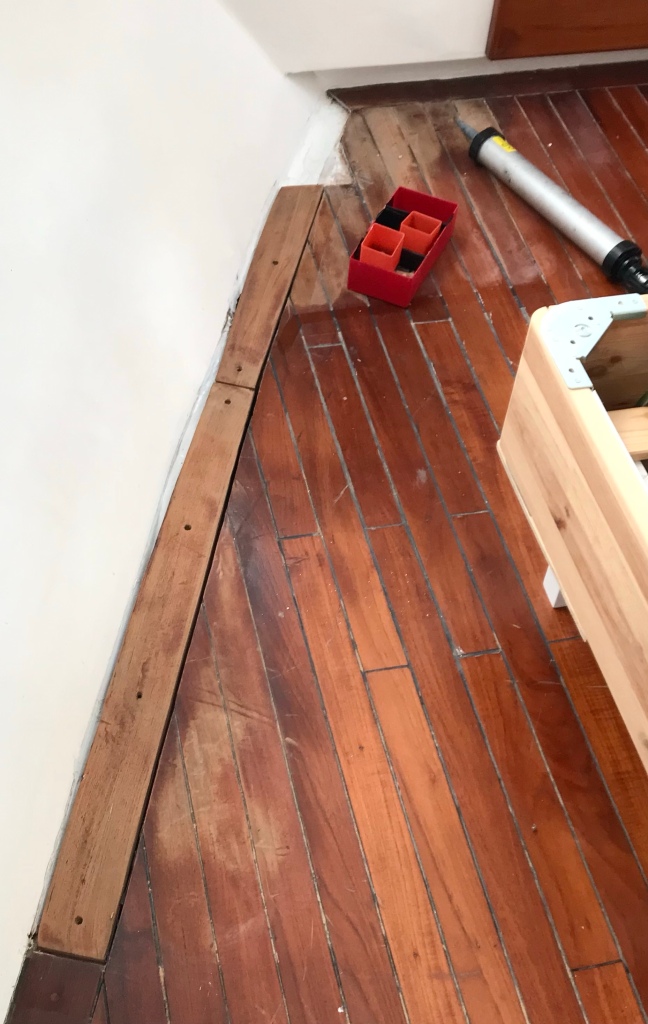
Termite dining damaged wooden support structures underneath the Bow Port room floorboards. The feasting had also eaten away at the storage cabinet’s lower surface.

Sketching the repair areas.

Though not massive damage, it was enough to become quite the challenge.
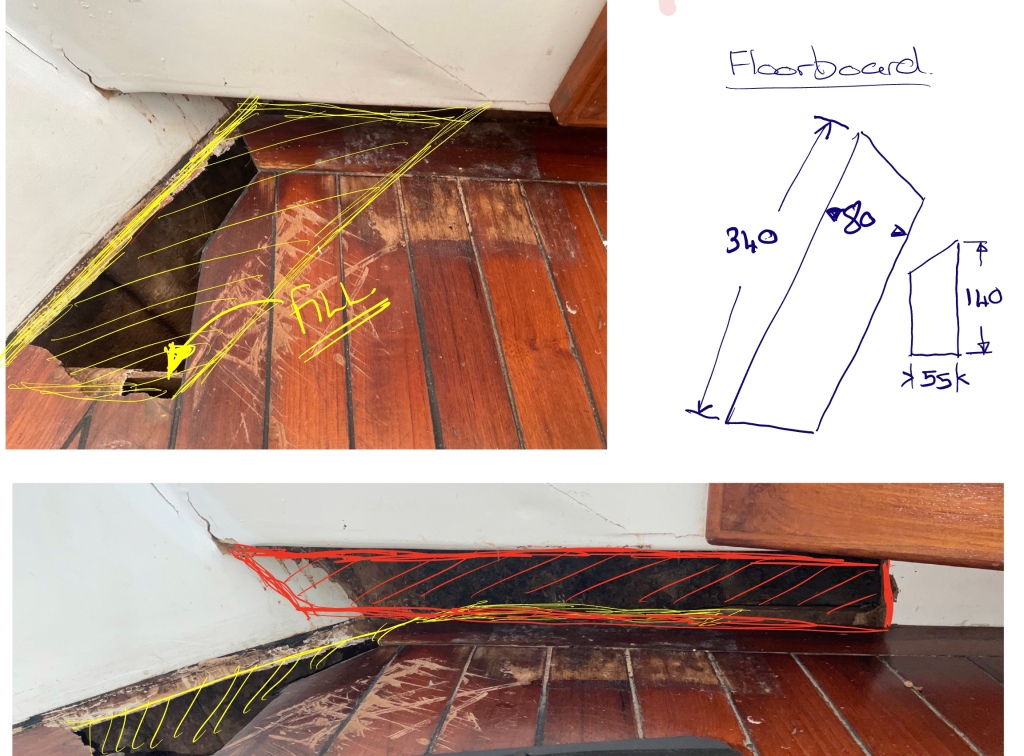
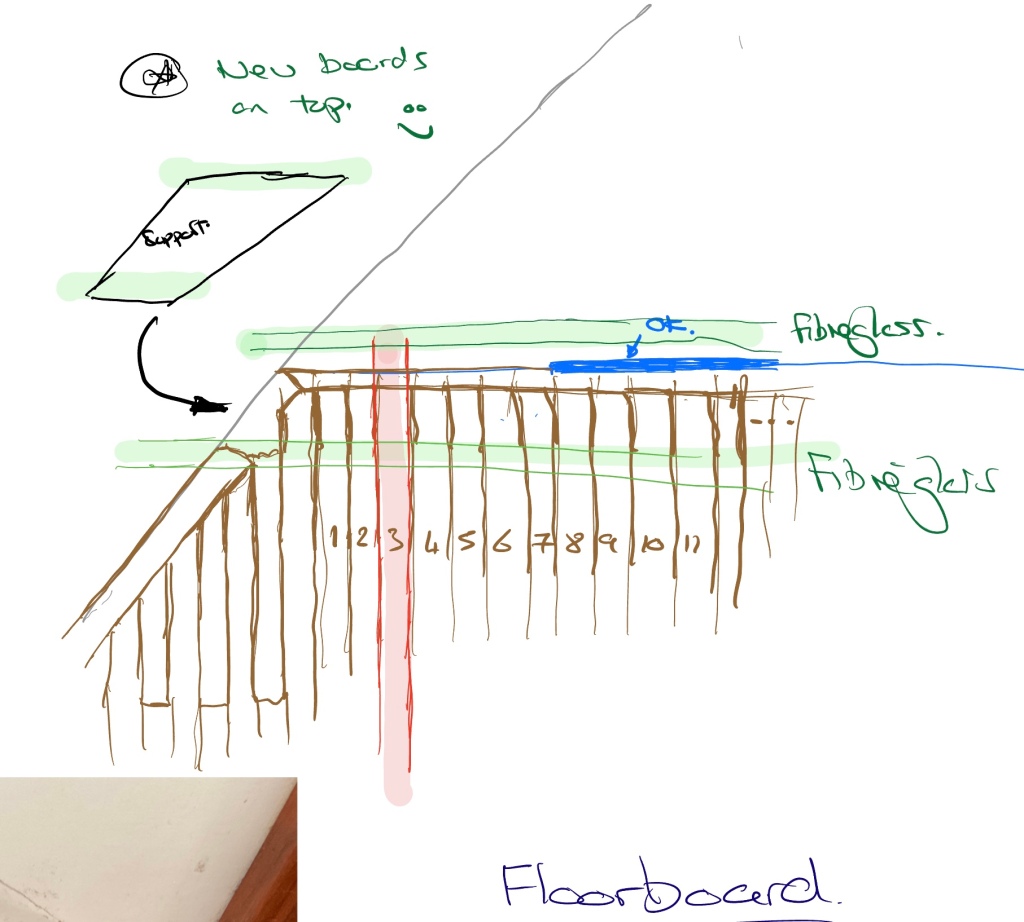
To help clarify my path forward I crafted a few repair sketches – thanks Noteability.

A few more sketch details to help me clarify work ahead

In addition to repairing the floor and wall the hull storage underneath the Bow bedroom required a tidy up.
We rearranged the stored content into 15 plastic storage boxes. Each with dehumidifying bags stashed inside.
Much better.

Side wall repair and painting plus replaced floor support timber.
No longer weak 🙂

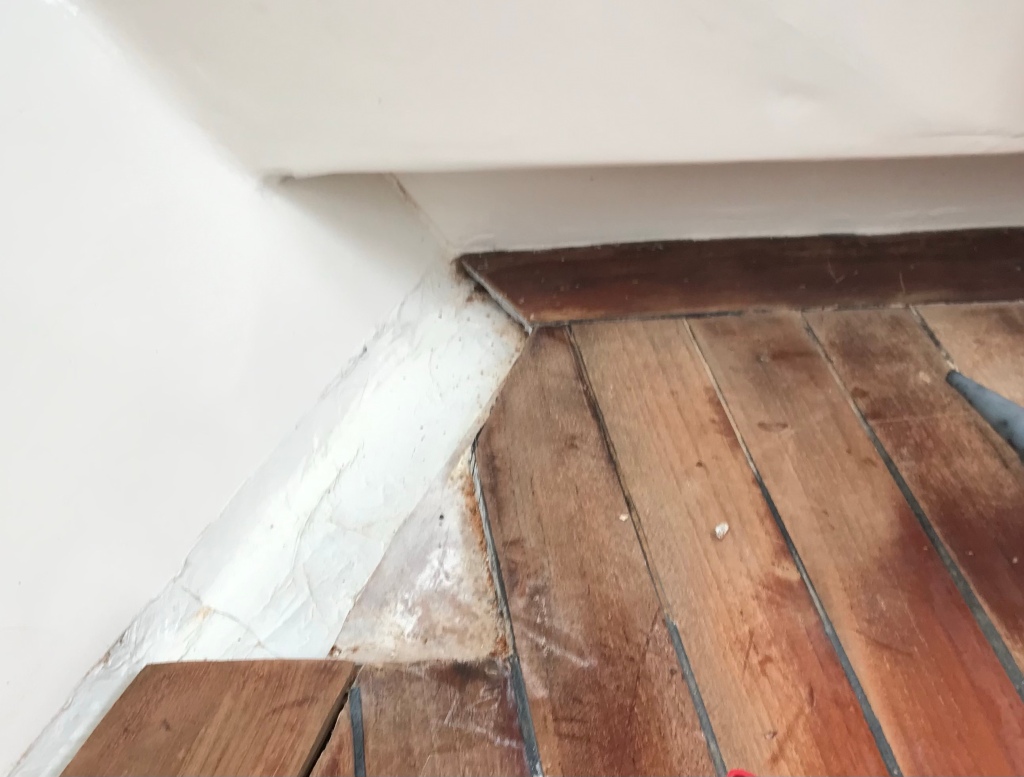
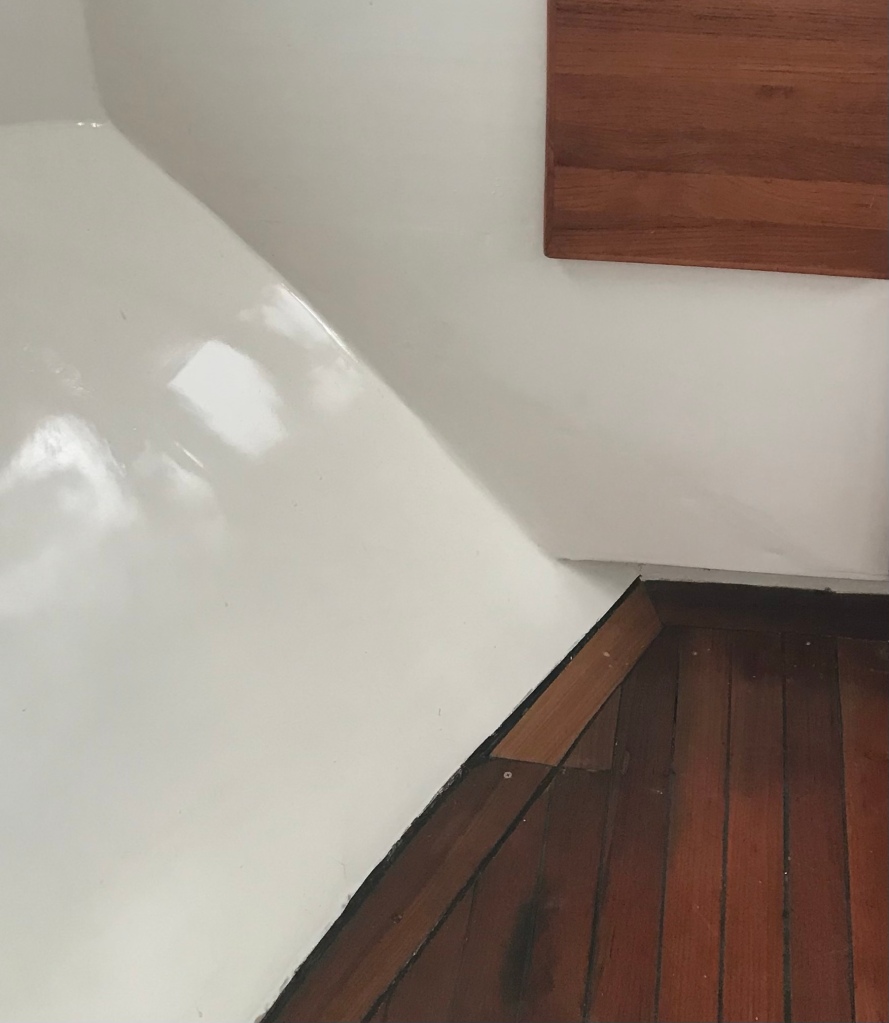
With the hole in the port side wall filled with fibreglass, sanded and repainted and the replacement underfloor support timber sealed firmly in place. It became time for new floorboard sections to be crafted and placed.

A view of the port wall repaired. Side underfloor support in place and the corner underfloor support in place. Black caulk replaced between boards.
Painted, sealed and ready for new floorboards to be cut and placed.
Exciting to have the floor restored to a stable condition.
The corner area that needed two smallish replacement floorboards.
The termites had actually eaten the original boards.
New Teak pieces provided by
Sun Hing Shing.
SO thankful to Eric from SHS.

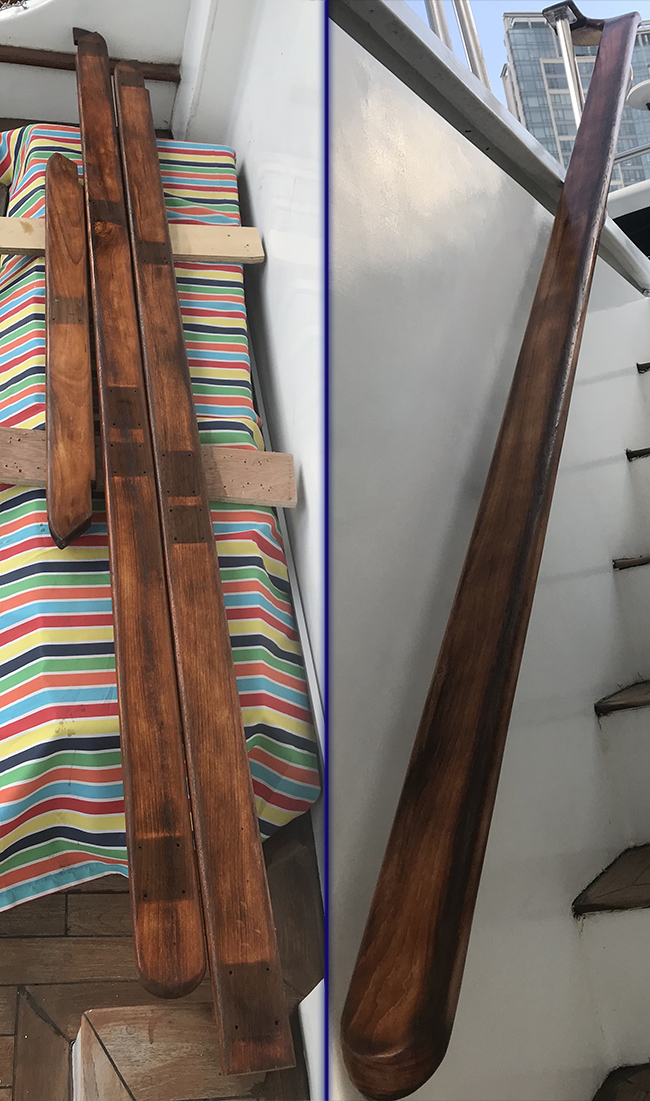
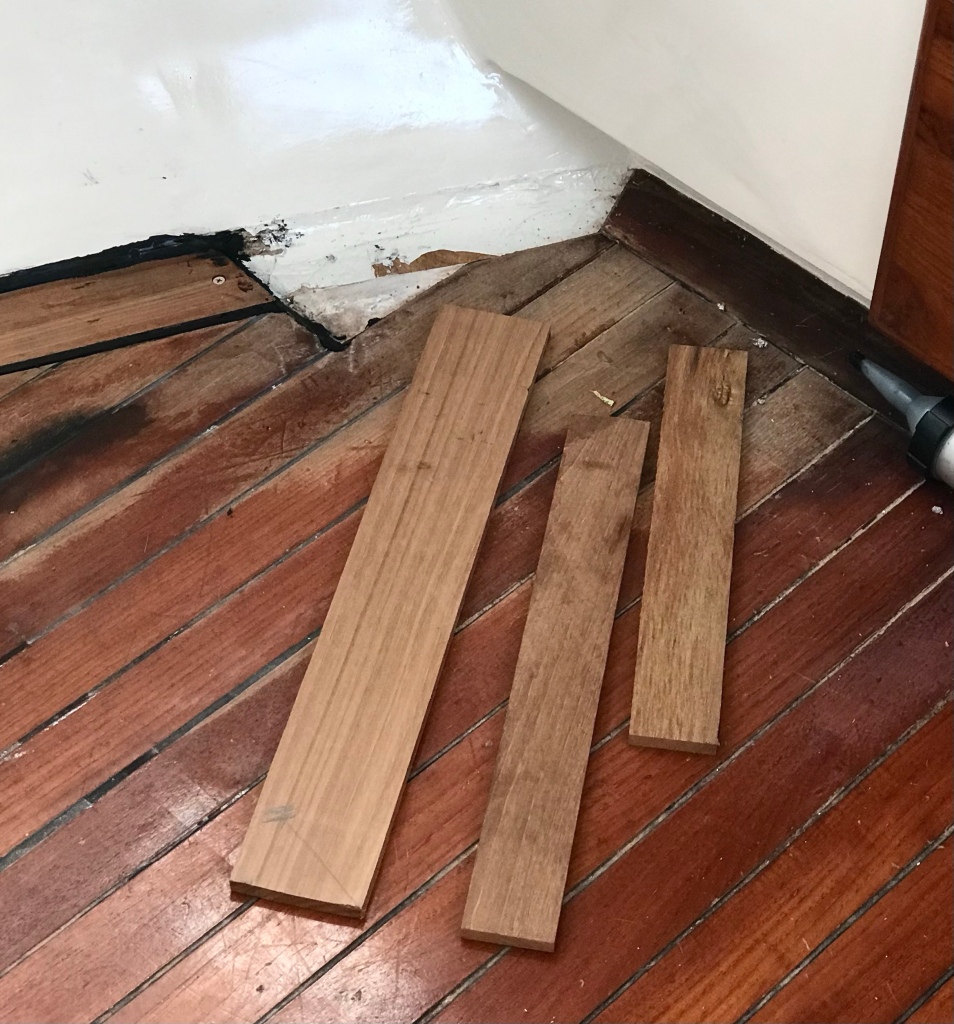
I am pleased to show that the boards were cut, placed and varnished with three coats of International varnish / Satin finish.
It’s good to know that the corner section of the room has been returned to a quality level.

Returned to stable and clean – next…

With that done it is time to move onto the room lighting, curtains and window sealant.

A little effort…

Some time with a heat gun, sander, elbow grease and things start to get better. Helping a friend tidy up an upper deck teak table. Getting there.

Guitar stand No 3 – best so far

Having a want for guitar stands to be situated in all sorts of locations in and around my boat. I dicided to make another one.
So off to Pinterest for some idea development.
With the ideas collated and sketched on the iPad in the brilliant app, Notability, I crafted a stencil to help mark required wood.

I happened to have a load of 3/8th laminated board available. Wanting a little more stability to the pieces I thought I’d double it’s thickness.

A little measuring, glueing, clamping and 24 hours later i had a stencil to cut out using my trusty old jig saw.

Pleased with the shape of the side panels that would hold the guitar, it was time to craft a centre support, fix the three pieces together, sand, seal with a thinners : varnish (75 : 25) mix and then decorate with the tiles from our fabulous floating neighbour Clare Kirk

I have become a clamp collector through working on wood projects. These handy little and large things are vital to making the processes a tad easier.
Clamped, sanded and completed.

Enjoying the blue tiles.

Thanks for the tiles Claire

The only thing added was some more blue tiles, clear pads to protect and stop guitar slipping about, and some felt feet pads.
Done 🙂

Best stand yet.

Holds my 12 string brilliantly.

SML – Upcycled trunk

Another Typhoon Mankut upcycle project. A 17″ height stump that’ll become a perfect stool for playing the guitar on, or just having a cuppa tea. I’m wanting to experiment a bit with swirling epoxy resin colors together, so that’ll be one end. My better half is conjuring up a design for the other end.

Below’s the stump as cut by the government, post typhoon carnage. Bark and odd angle included.

The stump as collected from Wong Chunk Hang, next to sports stadium.

Between dragging the log home and onto Alhambra and this writing, nearly 18 months, all I’ve done is remove the bark and let it dry out a bit.

As the globe is currently being threatened by the virus Covid-19, Hong Kong schools have been required to shut for an extended period of time. As a long term employee of the Hong Kong international School as Technology Coach / teacher I am included in the virtual learning adventure all schools are having to action.

I’m not going to go into that bar to say that we are encouraging students to get involved in working on a project of personal interest. Something that they can develop over time whilst developing knowledge and skill plus.

We have been operating this opportunity named ‘Self Motivated Learning’ [SML] for 5 years on site. With the virus keeping students operating remotely, we are encouraging student to make this happen at home.

Modeling the process, this project will be my SML.

Onwards.

The stump after having bark removed and drying out a bit.

The log sat at an odd angle so I had to level the end surfaces so it would sit flat and stand as upright as seemed best. The vertical alignment of the stump is a bit of a gamble and I feel something that the grain/texture of the tree impacts.

Working without a workbench and mass of structural tools to help secure things is a time eater. I have to always create make shift structures to support an secure items in order to get what I need to done.

A lot of scraps of wood help.

The make shift work bench and router guide Bob

Having worn out my previous router…. I used my new ‘Makita 3709 Trimmer / Router‘ to level the top surfaces flat. Loads of sawdust all over the place.

The Makita 3709 Trimmer/Router is noisy and dangerous, spinning at 30,000 revolutions per minute it decimates the products it comes into contract with. I ensure I am protected with full face respiration, ear protection and gloves. Safety being a major consideration – every time.

Saw dust city and pleasingly flat surfaces

With the surfaces closer to being flat now I can get on with the next steps. Those being to sand and varnish the sides, fine tune the flatness of the surfaces, route out the pools on each end, wait for the resin and confirm color and content design.

I’ve ordered 3KG of Epoxy Resin from Alibaba.com. A variety of color dyes have also been ordered.

I am sourcing my resin and dye from Lihsi Technology Co Ltd

More to follow.

Guitar stand games

Many moons ago, a long term friend offered me a variety of teak, salvaged from a sunken boat. Imagining all sorts of possibilities, I took loads of it. Below’s the plank this post is referring to.

Pinterest inspired me to look into building a Guitar stand. Having played the guitar since the late 70s, I have few and play daily. Having another guitar stand available seemed like a great idea and a good use for that plank of wood that’s been planking around the boat from place to place. Below’s the style I decided to go for.

Drawing the main column’s curves, stabilising foot shape and guitar holder structure directly onto the plank, clarified the Jig Saw’s cut path.

Knowing that Teak is a hard wood and can be quite the thing to cut, I choose to load the jig saw with a wide toothed blade (Bosch T144D). A load of saw dust later, I had the pieces I needed to make the stand.

My next step has been to join, glue, sand, shape and stain. Note the cat that actually thinks it’s helping out. Hmmm.

Must say that i’m happy with the support foot – it looks cool and it’s not even at its final shape yet. I’m also enjoying working on a project that requires attention to finer details. Not really like sanding a deck…

Railing upscale

IMG_8935.jpg
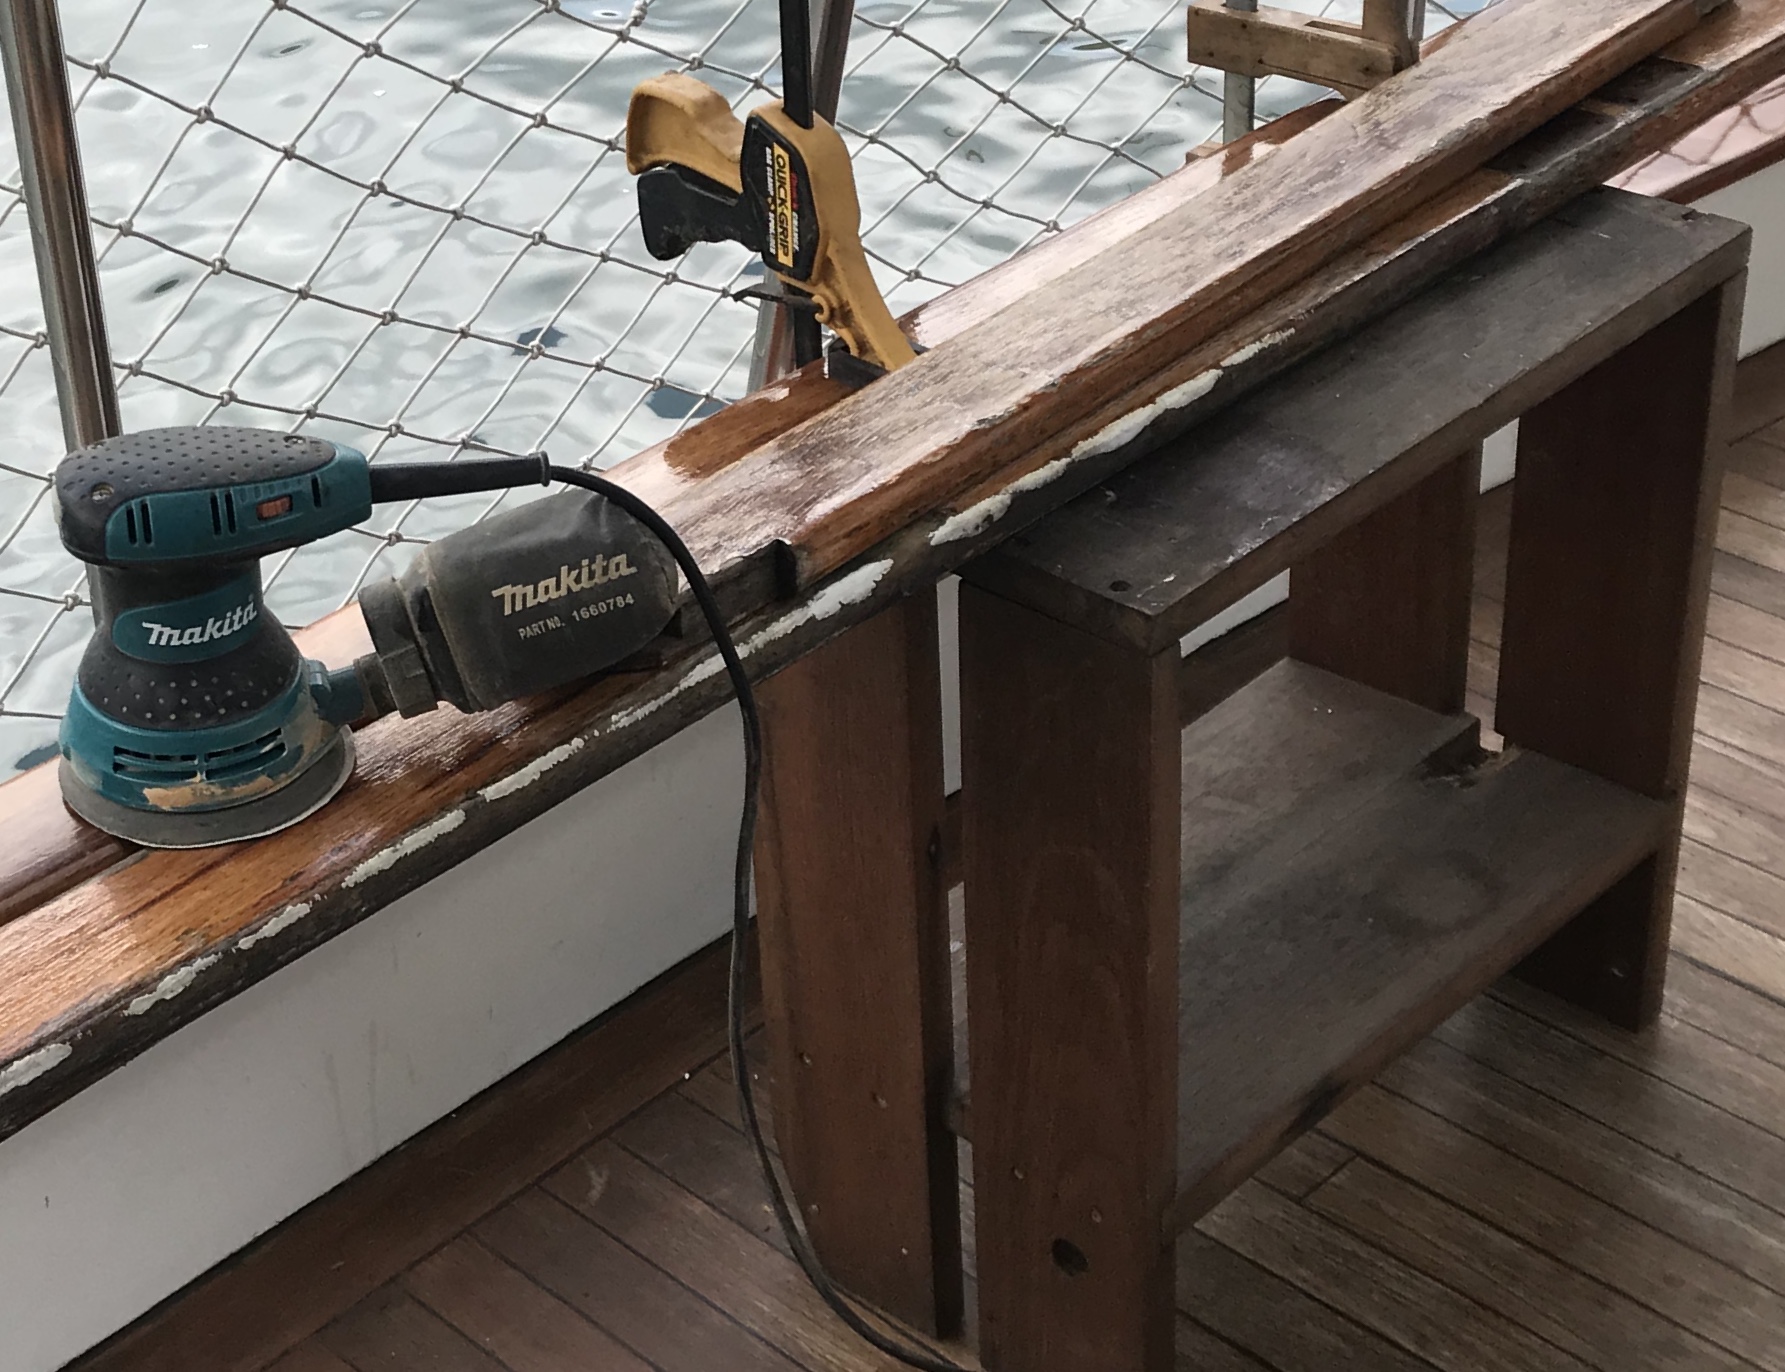
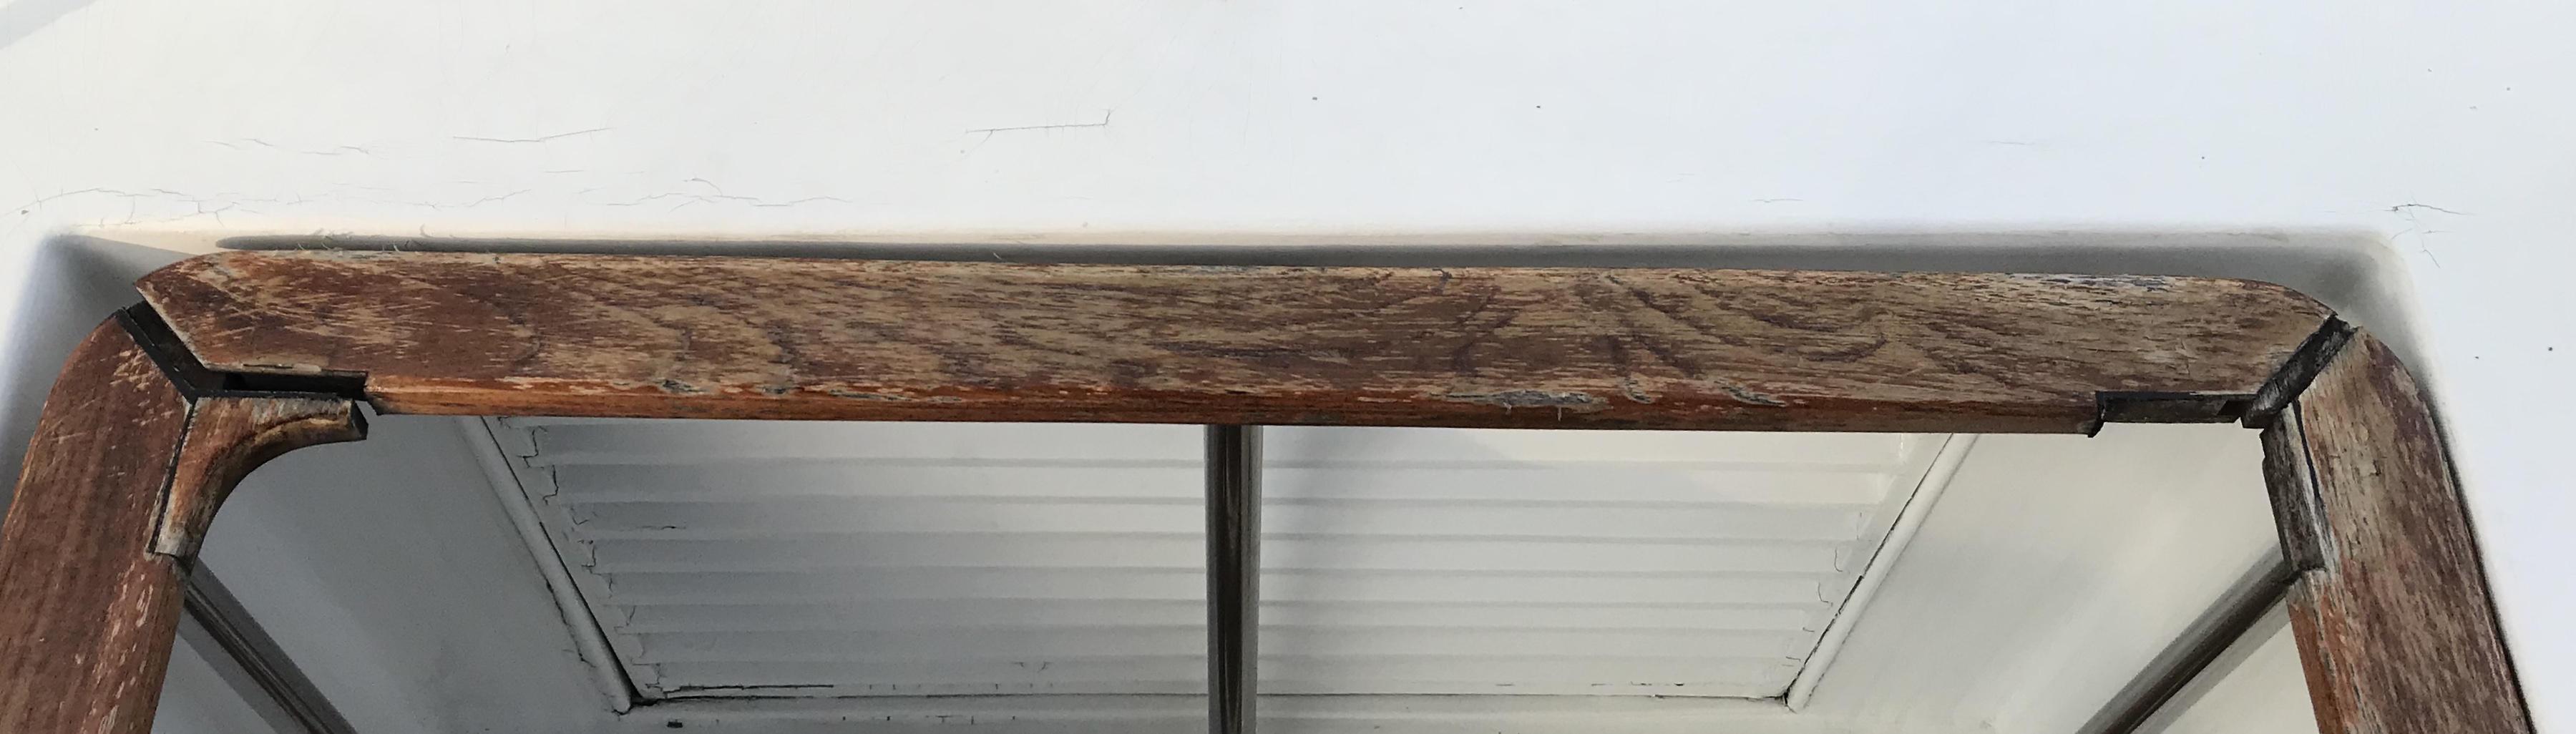
The grey flakiness of the sun hammered varnish is the sign to get the old Makita Orbital out again. Not that it had been put away at all…
With the main deck woodwork all varnished nicely and thoroughly, it is time to start working on the upper level. So, the railings on the staircase are the first stop.
Originally I thought I could get away with doing the sanding / varnishing with the railings remaining in place. Wanting to do a thorough job with the upkeep, leaving the railings in place and sanding effectively wasn’t going to be possible. So down came the railings and the sanding begun.

IMG_8936.jpg
I must say that I am getting much faster at dealing with this woodwork game.
Using the Teak stand thingie as a work bench, I managed to sand down to all four railings to clean wood with the help of a brutal 40 gauge sanding disc. Once roughed up and free of the old varnish, i brushed a healthy coat of  International thinner / varnish 30 / 70 to the back to the railings.
A good day’s work 🙂

IMG_8941 copy

Only another 5 coats to go …

It’s time to sand and revarnish the outside wooden surround.

So it’s railings off, sanding required and a three course Marine varnish to be applied.

The term “lifelong learning” springs to mind as I live the life onboard Alhambra. In this situation I speak about the maintenance of outdoor varnished woodwork

The exterior varnish on Alhambra is showing signs of being relentlessly beaten by the elements. It’s bow

Removal of the railings arching around the bow of Alhambra resulted in the chosen M&S biscuit tin housing a good 100 screws. A surprisingly time consuming task pleasingly sped up thanks to the cordless drill’s 18 inch screwdriver bit.

With the railings removed, accessing the surface for sanding and recaulking (in places) was easy. To start the process and remove the history of Marine varnish, the Makita Orbital sander, a range of sanding disc (60 to 120) and I set to it.